Import library modules
In this tutorial, you are going to write a simple dapp that enables you to store and look up telephone numbers. This tutorial illustrates how to import and use a few basic Motoko library functions.
For this tutorial, the Motoko base library functions are defined in the List and AssocList modules and enable you to work with lists as linked key-value pairs. In this example, the key is a name and the value is the phone text string associated with that name.
This dapp supports the following function calls:
The
insertfunction accepts thenameandphonekey-value pair as input stored in thebookvariable.The
lookupfunction is a query that uses the specifiednamekey as input to find the associated phone number.
Before you begin
Before starting the tutorial, verify the following:
You have downloaded and installed the SDK package as described in Download and install.
You have stopped the local canister execution environment provided by
dfx.
This tutorial takes approximately 10 minutes to complete.
Create a new project
To create a new project for this tutorial:
Open a terminal shell on your local computer, if you don’t already have one open.
Change to the folder you are using for your Internet Computer projects, if you are using one.
Create a new project by running the following command:
dfx new phonebookChange to your project directory by running the following command:
cd phonebook
Modify the default dapp
For this tutorial, let’s create a new main.mo file for the simple phone number lookup dapp.
To modify the default template:
Open the
src/phonebook/main.mofile in a text editor and delete the existing content.Copy and paste this code into the
main.mofile.In looking at this sample dapp, you might notice the following key elements:
The code defines
NameandPhoneas custom Text types. Creating user-defined types improves the readability of the code.The
insertfunction is an update call and thelookupfunction is a query call.The
Phonetype is identified as an optional value by using the?Phonesyntax.
Start the local canister execution environment
For development purposes dfx provides a local canister execution environment. This requires a dfx.json file, so you should be sure you are in your project’s root directory. For this tutorial, you should have two separate terminal shells, so that you can start and see the output of the local canister execution environment in one terminal and manage your project in another.
To start the local canister execution environment:
Open a new terminal window or tab on your local computer.
Navigate to the root directory for your project, if necessary.
You should now have two terminals open.
You should have the project directory as your current working directory.
Start the local canister execution environment on your local computer by running the following command:
dfx start --cleanFor this tutorial, we’re using the
--cleanoption to start the local canister execution environment in a clean state.This option removes any orphan background processes or canister identifiers that might disrupt normal operations. For example, if you forgot to issue a
dfx stopwhen moving between projects, you might have a process running in the background or in another terminal. The--cleanoption ensures that you can start the local canister execution environment and continue to the next step without manually finding and terminating any running processes.Leave the terminal that displays the output of the local canister execution environment open and switch your focus to your original terminal where you created your new project.
Register, build, and deploy the dapp
Once the local canister execution environment is up and running in your development environment, you can register, build, and deploy your dapp onto it.
To deploy the dapp locally:
Check that you are still in the root directory for your project, if needed.
Register, build, and deploy your dapp locally by running the following command:
dfx deploy phonebookThe
dfx.jsonfile provides default settings for creating a dapp frontend entry point andassetscanister.In previous tutorials, we deleted the entries for the asset canister because we were not adding a frontend for the sample dapp. That change kept our project workspace tidy by eliminating files that would go unused. There is no requirement to do this, however, and there is no harm in leaving the asset canister description in the
dfx.jsonfile. For example, you might want to use it as a placeholder if you intend to add frontend assets later.For this tutorial, you can deploy just the phonebook backend canister using the
dfx deploy phonebookcommand because the project doesn’t include any frontend assets and you will interact with it via the terminal.Although this tutorial illustrates how to skip compiling a frontend canister, you can add a simple user interface to this dapp later by exploring the phone-book project in the examples repository.
Add names and numbers using the insert function
You now have a dapp deployed as a canister on your local canister execution environment and can test your dapp by using dfx canister call commands.
To test the dapp you have deployed:
Use the
dfx canister callcommand to call the canisterphonebookusing theinsertfunction and pass it a name and phone number by running the following command:dfx canister call phonebook insert '("Chris Lynn", "01 415 792 1333")'Add a second name and number pair by running the following command:
dfx canister call phonebook insert '("Maya Garcia", "01 408 395 7276")'Verify that the command returns the number associated with "Chris Lynn" using the
lookupfunction by running the following command:dfx canister call phonebook lookup '("Chris Lynn")'The command returns output similar to the following:
(opt "01 415 792 1333")Try to call the
lookupfunction with the number associated with "Maya Garcia" by running the following command:dfx canister call phonebook lookup '("01 408 395 7276")'Note that, in this case, the command returns
(null)because the phone number is not a key associated with the "Maya Garcia" name entry.Try to call the
lookupfunction again to return the phone numbers for both "Maya Garcia" and "Chris Lynn" by running the following command:dfx canister call phonebook lookup '("Maya Garcia","Chris Lynn")'Because the dapp is written to return one value for one key, the command only returns information associated with the first key, in this example the phone number for
Maya Garcia.Test your code using the candid ui.
To test your code, follow the instructions [here](/docs/current/developer-docs/backend/backend-tutorials/candid-ui).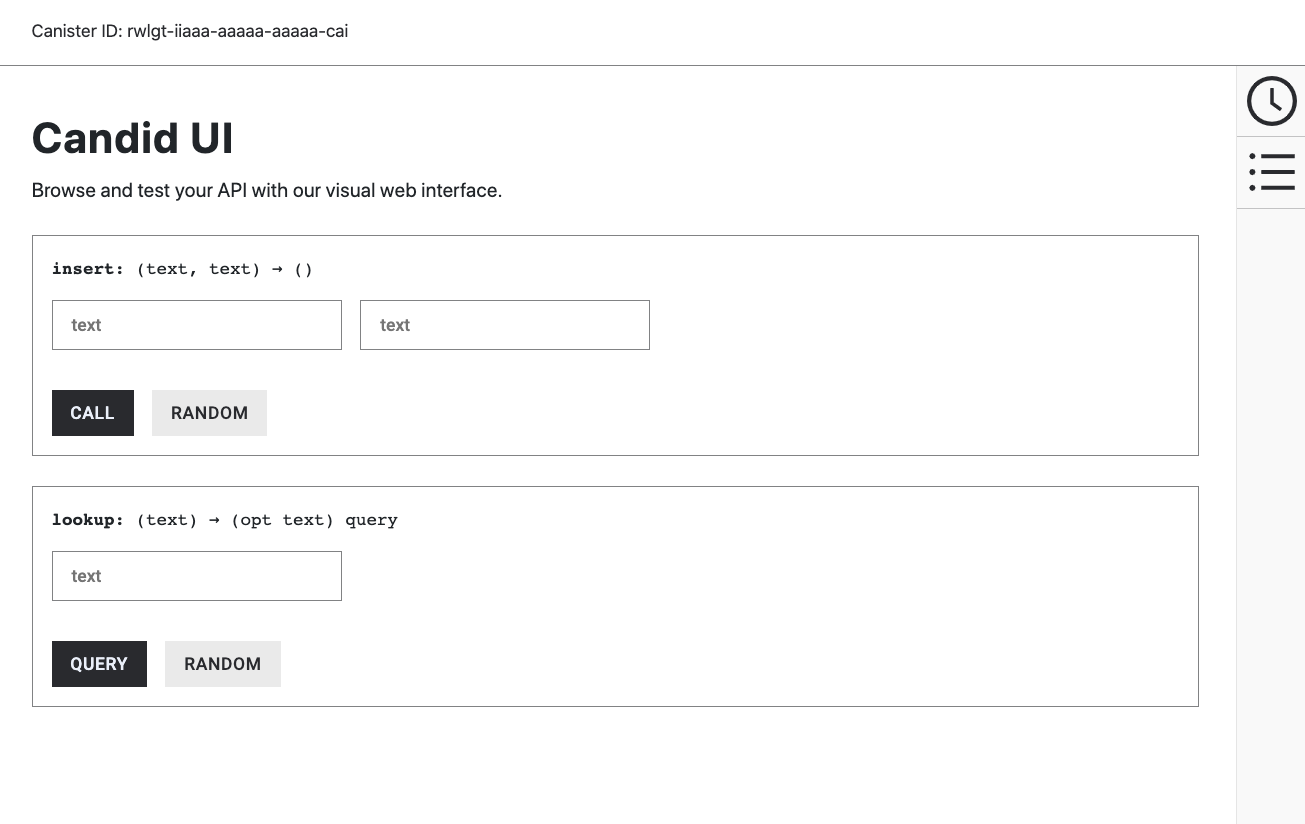
Revise the source code in your dapp
To extend what you have learned in this tutorial, you might want to try modifying the source code to return different results.
For example, you might want to change the source code so that instead of a dapp that inserts and looks up a current key-value (name-phone) pair to create a dapp that stores contact information similar to a database "record" in which a primary key is associated with multiple fields. In this example, your dapp might enable users or another dapp to add information—such as a home phone number, a cell phone number, an email address, and a street address—and selectively return all or specific field values.
Stop the local canister execution environment
After you finish experimenting with your dapp, you can stop the local canister execution environment so that it does not continue running in the background.
To stop the local canister execution environment:
In the terminal that displays network operations, press Control-C to interrupt the local network process.
Stop the local canister execution environment by running the following command:
dfx stop